Introduction
Why Won’t My Marshmallows Melt for Rice Krispie Treats?
Rice Krispie treats are a nostalgic favorite, known for their chewy texture and sweet marshmallow coating. But what happens when your marshmallows just won’t melt? Instead of transforming into a gooey, creamy mixture, they clump together, harden, or refuse to melt evenly.
This common issue can be frustrating, but the good news is that it’s usually easy to fix once you understand the underlying causes. In this article, we’ll explore the reasons why marshmallows don’t melt properly, how to prevent this problem, and foolproof solutions to rescue your batch.
Whether you’re working with old marshmallows, struggling with heat settings, or missing a key ingredient, we’ve got you covered. Let’s dive into the science of melting marshmallows and making perfect Rice Krispie treats every time!
Table of contents
Common Reasons Marshmallows Don’t Melt Properly
Common Reasons Marshmallows Don’t Melt Properly
Marshmallows are known for their fluffy texture and their ability to melt into a creamy consistency, making them the ideal base for Rice Krispie treats. However, several factors can prevent them from melting as expected. Here’s a breakdown of the most common culprits:
1. Stale Marshmallows
- Why It Happens: Over time, marshmallows lose their moisture and become dry and tough. Stale marshmallows often resist melting because they lack the pliability needed to break down.
- Signs of Staleness: They feel hard when squeezed, don’t bounce back, or stick together in clumps inside the bag.
2. Incorrect Heat Settings
- Why It Happens: Melting marshmallows requires a gentle heat. High heat can cause the sugar in marshmallows to caramelize too quickly, leading to a sticky, hard mass instead of a smooth melt.
- What to Watch For: Burned spots, uneven melting, or a gritty texture indicate the heat is too high.
3. Insufficient Butter or Fat
- Why It Happens: Marshmallows need fat to melt evenly. Butter not only prevents them from sticking to the pot but also helps distribute heat evenly across the mixture. Without enough butter, marshmallows may seize or clump.
4. Mixing Too Quickly
- Why It Happens: Rapid or aggressive stirring can disrupt the melting process, causing marshmallows to harden or separate instead of becoming a creamy mixture.
5. Old or Low-Quality Marshmallows
- Why It Happens: Low-quality marshmallows or those stored improperly may not contain the right balance of sugar and gelatin, making them difficult to melt.
6. Adding Dry Ingredients Too Early
- Why It Happens: If you add Rice Krispies or other mix-ins before the marshmallows are fully melted, they can interrupt the process, leaving you with lumpy, partially melted chunks.
7. Environmental Factors
- Why It Happens: Humidity or storage conditions can affect the consistency of marshmallows, making them sticky or difficult to melt. Always store marshmallows in an airtight container to maintain their texture.
Pro Tip: Fresh, soft marshmallows and proper technique are key to achieving that gooey consistency perfect for Rice Krispie treats.
If you’re considering alternatives to traditional marshmallows or troubleshooting other ingredients, check out this article Can You Substitute Marshmallow Fluff for Marshmallows?.
How Heat Affects Marshmallows
How Heat Affects Marshmallows
The process of melting marshmallows might seem straightforward, but their behavior under heat depends on a delicate balance of ingredients and technique. Understanding how heat interacts with marshmallows can help you avoid common pitfalls and achieve a smooth, gooey texture perfect for Rice Krispie treats.
The Science Behind Melting Marshmallows
Marshmallows are primarily composed of sugar, corn syrup, gelatin, and air. When heat is applied:
- Sugar and Corn Syrup: Begin to liquefy and create a sticky, smooth consistency.
- Gelatin: Softens, allowing the marshmallow to lose its structure and melt into a cohesive mass.
- Air: Escapes as the marshmallow heats, contributing to a denser melted mixture.
If the temperature isn’t carefully controlled, these ingredients may break down unevenly, leading to issues like clumping, hardening, or burning.
Low Heat vs. High Heat
- Low Heat (Recommended):
- Marshmallows melt gradually, allowing the sugar and gelatin to break down evenly.
- Prevents scorching or caramelization, resulting in a creamy texture ideal for recipes.
- High Heat (Avoid):
- Causes the sugars to cook too quickly, potentially creating a burnt or gritty texture.
- Can lead to hard, brittle marshmallows instead of a smooth, pliable mixture.
Pro Tip: Always use a low to medium heat setting when melting marshmallows for Rice Krispie treats. Be patient to achieve the best results.
To understand the differences between marshmallow types and their behaviors, refer to Marshmallows vs. Rice Krispies: A Sweet Showdown for a detailed comparison.
Role of Butter in Melting Marshmallows
Butter acts as a stabilizer during the melting process. It helps:
- Distribute heat evenly across the marshmallows.
- Prevent sticking to the pot.
- Create a rich, creamy base for the Rice Krispie mixture.
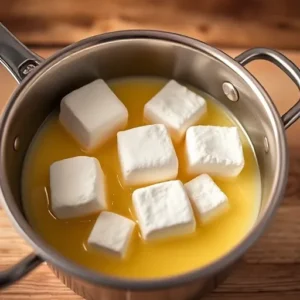
When melting marshmallows, always melt the butter first before adding the marshmallows. This ensures a non-stick surface and helps the marshmallows melt more smoothly.
Signs of Properly Melted Marshmallows
- The mixture is smooth, with no visible chunks.
- It has a shiny, cohesive appearance.
- It flows easily when stirred.
What Happens When Heat Is Mismanaged?
- Too Low:
- Marshmallows may clump together and resist melting, resulting in an uneven texture.
- Too High:
- The sugar in marshmallows can overheat and caramelize, turning the mixture sticky and hard.
- Inconsistent Heat:
- Uneven heating may lead to some marshmallows melting faster than others, creating lumps.
How to Maintain the Right Temperature
- Use a non-stick or heavy-bottomed saucepan to ensure even heat distribution.
- Stir continuously with a silicone or wooden spoon to avoid sticking and burning.
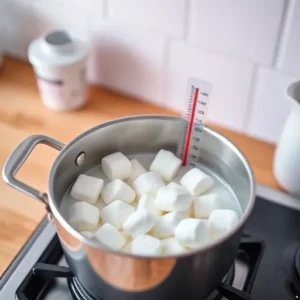
- If possible, use a candy thermometer and keep the temperature below 240°F (the soft ball stage) to prevent crystallization.

Choosing the Right Marshmallows for Melting
Choosing the Right Marshmallows for Melting
Not all marshmallows are created equal, and the type and quality of marshmallows you choose can significantly impact how they melt for your Rice Krispie treats. Here’s a guide to ensure you pick the perfect marshmallows for your recipe.
Freshness Matters
Why It’s Important:
Fresh marshmallows contain the right balance of moisture, sugar, and air, which makes them easy to melt. Stale marshmallows, on the other hand, tend to dry out, losing their softness and pliability.
How to Identify Fresh Marshmallows:
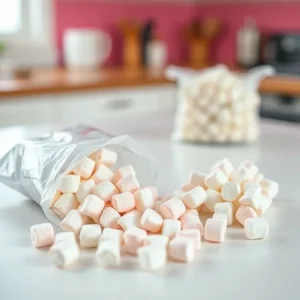
- They feel soft and bouncy when squeezed.
- Individual marshmallows don’t stick together in the bag.
- The expiration date on the bag is at least a few months away.
Avoid:
- Marshmallows that are hard, sticky, or clumped together.
Size Options: Which Works Best?
- Mini Marshmallows:
- Why Choose Them? Mini marshmallows melt faster and more evenly than large ones due to their smaller size. They’re the ideal choice for Rice Krispie treats.
- Regular Marshmallows:
- How to Use Them: Regular marshmallows can work if you cut them into smaller pieces or allow extra time for melting.
- Flavored or Specialty Marshmallows:
- Caution: These may contain additional ingredients or coatings that affect melting consistency. Stick to plain vanilla-flavored marshmallows for best results.
Brand Quality
Higher-quality brands often use better ingredients and maintain consistent moisture levels, which results in marshmallows that melt smoothly. Look for trusted names or read reviews to ensure reliability.
Pro Tip: Cheaper, generic brands may use more starch or artificial fillers, which can interfere with melting.
Choosing the right marshmallows can make or break your recipe. If you’re curious about other creative marshmallow-based recipes, explore Rice Crispy Cakes with Marshmallow Fluff for inspiration.
Storage Practices to Maintain Freshness
Improper storage can ruin even the freshest bag of marshmallows. Follow these tips to keep them ready for melting:
- Seal the Bag Tightly: Use a clip or transfer marshmallows to an airtight container after opening.
- Store in a Cool, Dry Place: Avoid humidity, which can make marshmallows sticky.
- Freeze for Long-Term Storage: If you’re not using marshmallows immediately, freeze them in a zip-top bag. Thaw at room temperature before use.
Can Old Marshmallows Be Revived?
If you only have stale marshmallows, here’s how to soften them:
- Add a Slice of Bread to the Bag: The moisture from the bread can rehydrate the marshmallows overnight.
- Microwave Method: Place marshmallows in a microwave-safe bowl with a damp paper towel on top. Heat in 5-second intervals until softened.
While these methods can help, it’s still best to use fresh marshmallows for smooth melting.
Why Fresh Marshmallows Are Best for Rice Krispie Treats
Fresh marshmallows ensure:
- A gooey, creamy consistency that binds the Rice Krispies perfectly.
- Even melting, free of clumps or hard spots.
- The light, fluffy texture that makes Rice Krispie treats so iconic.

Step-by-Step Guide to Melting Marshmallows
Step-by-Step Guide to Melting Marshmallows
Melting marshmallows for Rice Krispie treats is simple when done correctly. This step-by-step guide will ensure you achieve a perfectly smooth, gooey consistency every time.
Ingredients You’ll Need
- 4 tablespoons (1/2 stick) of unsalted butter
- 10 ounces (1 standard bag) of mini marshmallows
- 6 cups of Rice Krispies cereal (for mixing after melting)
Equipment Required
- A non-stick saucepan or heavy-bottomed pot
- A silicone spatula or wooden spoon for stirring
- Measuring cups
- A large mixing bowl
Steps to Melt Marshmallows for Rice Krispie Treats
1. Prepare Your Ingredients
Before you start, measure out all ingredients to ensure a smooth process. Marshmallows melt quickly, so it’s important to have everything ready to go.
2. Melt Butter Over Low Heat
- Place your saucepan over low heat and add the butter.
- Stir gently until the butter is fully melted. This step ensures the marshmallows won’t stick to the pan or burn during melting.
3. Add the Marshmallows Gradually
- Add mini marshmallows to the melted butter.
- Stir gently and continuously with a silicone spatula or wooden spoon. Avoid letting the marshmallows sit still for too long, as this can lead to uneven melting or scorching.
Pro Tip: If using regular marshmallows, cut them into smaller pieces for faster melting.
4. Monitor the Heat
- Keep the heat low to prevent burning. Marshmallows should slowly break down into a smooth, cohesive mixture.
- Avoid raising the temperature, as high heat can cause marshmallows to caramelize or harden.
5. Stir Until Smooth
- Continue stirring until the mixture is lump-free, shiny, and gooey.
- If you notice any unmelted pieces, lower the heat slightly and keep stirring.
6. Remove from Heat
- Once the marshmallows are fully melted, remove the saucepan from the heat immediately. Prolonged exposure to heat can cause the mixture to thicken too much, making it harder to combine with the Rice Krispies.
7. Mix in Rice Krispies Quickly
- Pour the Rice Krispies cereal into the melted marshmallow mixture.
- Stir rapidly but gently to coat the cereal evenly before the mixture starts to cool and set.
8. Transfer to a Prepared Dish
- Grease a 9×13-inch baking dish with butter or non-stick spray.
- Press the Rice Krispie mixture evenly into the dish using a buttered spatula or wax paper.
Common Mistakes to Avoid
- Using High Heat: Leads to uneven melting and hard marshmallows.
- Rushing the Process: Skipping steps or using too much heat can result in lumpy, burnt marshmallows.
- Overcooking the Mixture: Once melted, remove the marshmallows from heat to avoid thickening or hardening.
Alternative Methods for Melting Marshmallows
- Microwave Method:
- Place marshmallows and butter in a microwave-safe bowl.
- Heat in 30-second intervals, stirring between each, until fully melted.
- Double-Boiler Method:
- Place the saucepan over a pot of simmering water to melt the butter and marshmallows gently.
These methods are great if you don’t have access to a stove or want additional control over the melting process. By the way If you’re experimenting with healthier versions of Rice Krispie treats or want additional variations, you may find ideas in Healthy Rice Crispy Cakes: A Guilt-Free Treat for All Ages.

How to Fix Hard Marshmallows and Tips for Perfect Rice Krispie Treats
How to Fix Hard Marshmallows While Melting
Sometimes, even with the best intentions, your marshmallows may harden or clump while melting. Don’t worry—there are several simple ways to fix this issue and salvage your Rice Krispie treat mixture.
How to Fix Hard Marshmallows
- Add Liquid to Loosen the Mixture
- Stir in 1–2 tablespoons of milk, water, or cream if the marshmallows begin to harden while melting.
- The added moisture helps dissolve any sugar crystallization and restores a creamy consistency.
- Reheat Gently
- Return the pan to low heat and stir constantly. Avoid turning up the heat to speed up the process, as this can cause further hardening.
- Use a Double Boiler
- If the mixture is still too thick, transfer it to a double boiler. The indirect heat allows the marshmallows to melt more gently.
- Break Up Clumps with a Spoon
- Use the back of your spoon or spatula to press and break up any stubborn clumps of marshmallow.
- Start Fresh If Necessary
- If the mixture is burnt or irreparably hard, it may be best to start over with a fresh batch of marshmallows.
Tips for Perfect Rice Krispie Treats Every Time
To ensure your Rice Krispie treats turn out perfectly chewy and gooey, follow these expert tips:
1. Use Fresh Ingredients
- Always use fresh marshmallows and cereal for the best texture and flavor. Stale ingredients can result in a dry, brittle treat.
2. Avoid Overpacking the Pan
- When transferring the mixture to the baking dish, press it down gently with a buttered spatula or wax paper. Overpacking can make the treats too dense.
3. Work Quickly
- Once the marshmallows are melted, mix in the Rice Krispies immediately. The mixture will start to set as it cools, so speed is key.
4. Add Flavor Enhancements
- Stir in extras like vanilla extract, a pinch of salt, or a drizzle of caramel to elevate the flavor.
5. Use the Right Butter-to-Marshmallow Ratio
- For a standard recipe, the ideal ratio is about 4 tablespoons of butter to 10 ounces of marshmallows. Too much butter can make the treats greasy, while too little can lead to sticking.
6. Store Properly
- Store Rice Krispie treats in an airtight container at room temperature for up to 3 days. To keep them soft, add a slice of bread to the container to maintain moisture.
Pro Tip: If you want ultra-chewy treats, slightly under-measure the Rice Krispies cereal. This keeps the marshmallow mixture more dominant in the final texture.
Conclusion: Mastering Marshmallow Melting
Melting marshmallows for Rice Krispie treats might seem simple, but it requires attention to detail and the right techniques. By understanding the common reasons why marshmallows fail to melt and following the step-by-step instructions and troubleshooting tips provided in this guide, you can ensure your treats turn out perfectly every time.
Whether you’re making a nostalgic batch for a family gathering or experimenting with fun add-ins, the key is to use fresh ingredients, low heat, and a little patience. Now that you know how to handle even the most stubborn marshmallows, you’re ready to create gooey, chewy Rice Krispie treats that everyone will love.
If you’re curious about creative ways to use marshmallow fluff, check out recipes like Rice Crispy Cakes with Marshmallow Fluff.

