Boston Cream Cake Recipe: A Classic Dessert Guide
Boston cream cake is a delightful dessert that blends layers of tender cake, creamy custard filling, and a rich chocolate glaze. A spin-off of the famous Boston cream pie, this cake has earned its place as a classic treat for celebrations or a cozy evening indulgence. Let’s embark on a delicious journey to discover everything about this timeless dessert—from its history and ingredients to troubleshooting common problems.
Table of contents
What Is a Boston Cream Cake?
The Origin and History of Boston Cream Cake
Boston cream cake owes its origins to the famous Boston cream pie, which was invented in the 19th century at the Parker House Hotel in Boston. The original dessert combined sponge cake with custard filling, topped with chocolate glaze. Over time, the “pie” evolved into a cake, offering a more structured dessert that’s easier to slice and serve.
Fun Fact: “Did you know that Boston cream pie is the official dessert of Massachusetts? 🍰”
Boston Cream Pie vs. Boston Cream Cake: Key Differences
While the two desserts share similar components, the difference lies in the presentation. Boston cream pie is typically made with sponge cake layers resembling a pie, while Boston cream cake is a more traditional, layered cake. The chocolate glaze and creamy filling, however, remain staples in both desserts.
Why This Cake Remains a Timeless Favorite
Boston cream cake has stood the test of time for its perfect balance of flavors and textures. The combination of fluffy cake, creamy custard, and velvety chocolate glaze makes it a universal crowd-pleaser.
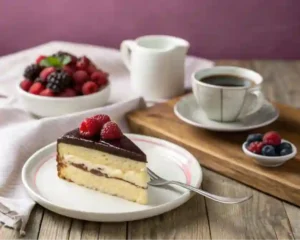
Pro Tip: “Pair your Boston cream cake with a cup of coffee or tea to enhance the flavors.”
Key Ingredients for Boston Cream Cake
The Perfect Cake Base: Options for Success
- Cake Type: Most recipes use a sponge or yellow cake for the base. These options are light, allowing the custard filling and chocolate glaze to shine.
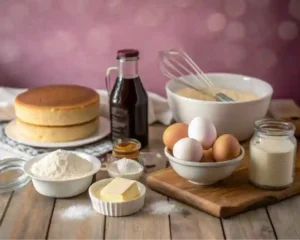
- Ingredients: Basic staples like flour, sugar, eggs, butter, and milk.

How to Make a Creamy Custard Filling
The custard filling is the heart of this dessert.
- Key Ingredients: Milk, sugar, egg yolks, cornstarch, and vanilla extract.
- Tips: Whisk continuously while heating the mixture to avoid lumps and ensure a smooth consistency.
Creating the Signature Chocolate Glaze
- Ingredients: Heavy cream, semi-sweet chocolate chips, and a touch of butter.
- Method: Heat the cream, pour it over the chocolate chips, and stir until smooth. The butter adds a glossy finish.
Quick Tip: “Use high-quality chocolate for a glaze that’s rich and decadent.”
Tools You’ll Need for Baking Boston Cream Cake
Essential Baking Equipment
- Mixing bowls, a whisk, a spatula, and a stand mixer for efficient preparation.
- A 9-inch round cake pan or springform pan to bake the layers evenly.
Useful Accessories for Precision and Ease
- A cake leveler for even layers.
- A pastry bag (optional) to pipe the custard filling for a cleaner presentation.
Discover more tips for perfect cakes in our guide to Custard Pie vs. Cream Pie.
Step-by-Step Instructions for Boston Cream Cake
Ready to create your own Boston cream cake? Here’s a detailed guide to making each component from scratch. Don’t worry—it’s easier than it looks, and the results are worth every step!

Preparing the Cake Base
- Ingredients:
- 2 1/2 cups all-purpose flour
- 2 1/2 tsp baking powder
- 1/2 tsp salt
- 1/2 cup unsalted butter, softened
- 1 1/2 cups granulated sugar
- 3 large eggs
- 1 cup whole milk
- 2 tsp vanilla extract
- Instructions:
- Preheat your oven to 350°F (175°C) and grease two 9-inch round cake pans.
- In a medium bowl, whisk together flour, baking powder, and salt. Set aside.
- Cream the butter and sugar until light and fluffy, about 3 minutes. Add eggs one at a time, beating well after each addition.
- Mix in vanilla extract.
- Alternate adding the dry ingredients and milk to the butter mixture, starting and ending with the dry ingredients. Mix just until combined.
- Divide the batter evenly between the prepared pans. Bake for 25-30 minutes, or until a toothpick inserted in the center comes out clean.
- Let the cakes cool in the pans for 10 minutes, then transfer to a wire rack to cool completely.
Pro Tip: “Use parchment paper circles in the pans for easy removal and perfectly smooth layers.”
Making the Custard Filling
- Ingredients:
- 2 cups whole milk
- 1/2 cup granulated sugar
- 1/4 cup cornstarch
- 4 large egg yolks
- 2 tsp vanilla extract
- Instructions:
- In a medium saucepan, heat the milk over medium heat until steaming but not boiling.
- In a separate bowl, whisk together sugar, cornstarch, and egg yolks until smooth.
- Slowly pour the hot milk into the egg mixture while whisking constantly to temper the eggs.
- Return the mixture to the saucepan and cook over medium heat, whisking continuously, until thickened (about 3-5 minutes).
- Remove from heat, stir in vanilla extract, and transfer to a bowl. Cover with plastic wrap directly on the surface to prevent a skin from forming. Refrigerate until cool.
Quick Fact: “Custard thickens as it cools, so don’t worry if it looks a little runny when warm.”
Assembling the Cake Like a Pro
- Level the Cakes: Use a serrated knife or cake leveler to trim the domed tops of each cake layer for an even surface.
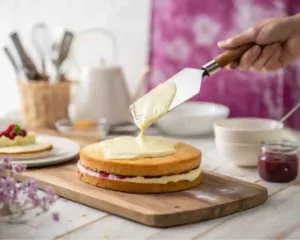
- Add the Custard Filling: Place one cake layer on a serving plate. Spread the chilled custard filling evenly across the surface, leaving a slight border around the edges.
- Top with the Second Layer: Gently place the second cake layer on top, pressing lightly to secure it.
Pro Tip: “Chill the assembled cake for 30 minutes before adding the glaze to prevent the layers from sliding.”
Topping It Off with the Chocolate Glaze
- Ingredients:
- 1 cup heavy cream
- 8 oz semi-sweet chocolate chips
- 1 tbsp unsalted butter
- Instructions:
- Heat the heavy cream in a small saucepan over medium heat until just simmering.
- Pour the hot cream over the chocolate chips in a heatproof bowl. Let sit for 2 minutes, then stir until smooth. Add the butter and mix until glossy.
- Pour the glaze over the assembled cake, letting it drip down the sides for a beautiful finish. Use a spatula to spread it evenly if needed.
Fun Tip: “For a professional look, let the glaze set for about 15 minutes before serving.”
Common Variations of Boston Cream Cake
Boston cream cake is endlessly adaptable. Let’s explore some popular variations that can suit different tastes and dietary needs.
Mini Boston Cream Cakes for Individual Servings
- How to Make Them: Use a muffin tin to bake mini sponge cakes, then layer each one with custard and glaze individually.
- Why It Works: Perfect for parties or portion control, these bite-sized cakes are as adorable as they are delicious.
Gluten-Free Boston Cream Cake Recipe
- Substitutions: Replace all-purpose flour with a gluten-free baking blend, and ensure the custard thickener is gluten-free (like cornstarch).
- Tips: Add an extra egg to improve the structure of the cake, as gluten-free batters can be more fragile.
Vegan Boston Cream Cake Options
- Substitutions: Use plant-based milk for the custard and vegan butter for the cake and glaze. Substitute eggs with flaxseed meal or applesauce.
- Flavor Boost: Add a pinch of turmeric to the custard for a golden hue without altering the flavor.
Quick Tip: “Vegan cakes may take longer to bake, so keep an eye on them and test with a toothpick.”
Troubleshooting, Serving Ideas, and FAQs for Boston Cream Cake
Troubleshooting Boston Cream Cake Problems
Even the best bakers run into issues. Here are common problems you might encounter with Boston cream cake and how to fix them.
Why Did My Custard Filling Turn Out Runny?
Custard filling that’s too runny can be frustrating, but it’s a common problem with an easy fix.
- Causes:
- Insufficient cooking time. The custard needs to reach the right temperature for the cornstarch to thicken properly.
- Not enough cornstarch or egg yolks in the recipe.
- Solutions:
- Whisk the custard over medium heat until it thickens enough to coat the back of a spoon.
- If the custard has already cooled and is still runny, try reheating it gently and adding a slurry of cornstarch mixed with cold milk.
Pro Tip: “Always cool your custard with plastic wrap pressed directly on the surface to prevent condensation from watering it down.”
Discover tips for perfecting custard-based desserts every time
How to Avoid a Dense or Dry Cake Base
Dense or dry cakes are often the result of overmixing or overbaking.
- Causes:
- Overmixing the batter, which develops too much gluten.
- Overbaking, which dries out the cake.
- Solutions:
- Mix the batter just until the dry ingredients are incorporated.
- Set a timer and check for doneness 2–3 minutes before the recipe suggests.
Quick Tip: “For extra moisture, brush the cake layers with a light sugar syrup before adding the custard.”
Preventing Cracks in the Chocolate Glaze
Cracks in the glaze can detract from the cake’s appearance.
- Causes:
- The glaze was applied while too hot.
- The cake was too cold, causing the glaze to harden unevenly.
- Solutions:
- Let the glaze cool slightly before pouring it over the cake.
- Bring the cake to room temperature before adding the glaze for a smooth finish.
Creative Ways to Serve Boston Cream Cake
Boston cream cake is versatile and can be presented in many ways to suit any occasion. Here are some ideas to make it even more special.

Pairing the Cake with Drinks and Desserts
- Coffee Pairing: A cup of strong black coffee or a latte balances the cake’s sweetness.
- Tea Pairing: Earl Grey or chamomile tea adds a subtle contrast to the rich flavors.
- Dessert Combos: Serve a slice with a scoop of vanilla ice cream or a dollop of whipped cream.
Fun Fact: “Boston cream cake is a favorite pairing with warm beverages, making it an excellent winter dessert.”
Decorating Ideas for Special Occasions
- Festive Garnishes: Top the cake with chocolate curls, edible flowers, or gold sprinkles for a celebratory touch.
- Themed Presentation: Use cookie cutters to create chocolate shapes for birthdays or holidays.
Turning Leftovers into New Desserts
- Trifle: Layer leftover cake pieces with custard and whipped cream in a glass for a quick trifle.
- Cake Pops: Mix crumbled cake with a little custard, roll into balls, and dip in melted chocolate for bite-sized treats.
- Parfaits: Create a parfait by layering crumbled cake with custard and fresh berries in individual cups.
Frequently Asked Questions About Boston Cream Cake
Can I Make Boston Cream Cake Ahead of Time?
Yes, Boston cream cake is an excellent make-ahead dessert! You can prepare the cake layers and custard filling a day in advance. Assemble the cake and refrigerate it, adding the glaze just before serving for the best presentation.
How Long Does Boston Cream Cake Stay Fresh?
When stored properly, Boston cream cake stays fresh for:
- Refrigerator: 3–4 days if covered tightly with plastic wrap.
- Freezer: Up to 2 months. For freezing, wrap individual slices in plastic wrap and place them in a freezer-safe container.
Can I Use Store-Bought Custard for Convenience?
Yes, store-bought custard can save time, but homemade custard has a richer flavor and creamier texture. If you use pre-made custard, make sure it’s thick enough to hold its shape between the layers.
Pro Tip: “Whisk store-bought custard with a bit of vanilla extract to enhance its flavor.”
What’s the Best Way to Slice and Serve the Cake?
- Slicing: Use a sharp, serrated knife and clean it between cuts for neat slices.
- Serving: Serve chilled or at room temperature with a garnish of fresh berries or a drizzle of extra chocolate glaze.
Conclusion: Why You’ll Love Making Boston Cream Cake
Boston cream cake is more than just a dessert—it’s a journey into classic flavors and indulgent textures. With its tender cake layers, creamy custard filling, and rich chocolate glaze, this cake is a surefire hit for birthdays, holidays, or any day you want to treat yourself.
Whether you’re a beginner baker or a seasoned pro, this recipe offers something for everyone. Experiment with variations, troubleshoot with confidence, and enjoy the process of creating a dessert that’s as satisfying to make as it is to eat.
Final Thought: “Making Boston cream cake isn’t just about following a recipe—it’s about savoring a slice of tradition and sharing joy with those you love.”
For more dessert inspiration, explore Creative Cake Recipes and find new favorites to add to your baking repertoire.

